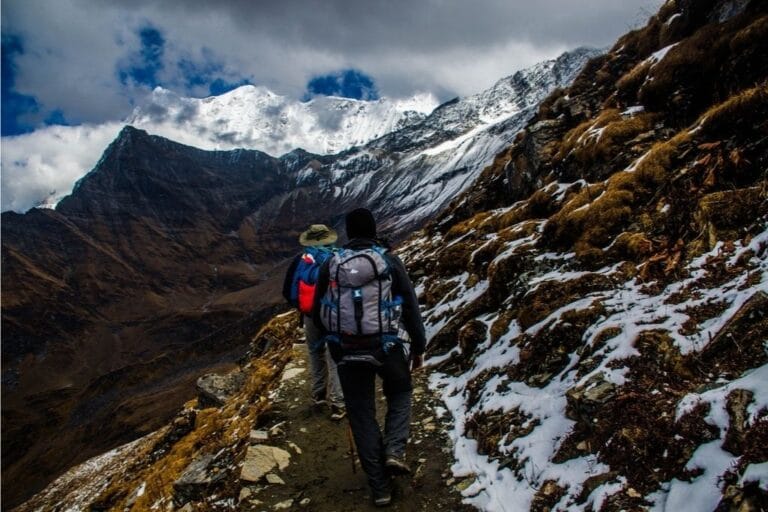

To train for downhill hiking, strengthen your quadriceps, glutes and calves in their lengthening (eccentric) phase, improve balance and ankle stability, and practise real descents with a loaded pack. Descents hurt because your thigh muscles act as brakes on every step, which causes soreness and loads the knees far more than climbing does. Six to eight weeks of targeted strength work, combined with good technique and trekking poles, makes a big difference.

Quick answer: the downhill training essentials
| Focus | Why it matters | Key exercises |
|---|---|---|
| Eccentric quad strength | Quads control every downward step | Slow step-downs, eccentric squats, split squats |
| Glutes and hips | Keep knees tracking straight and stabilise the pelvis | Single-leg Romanian deadlifts, lateral band walks, glute bridges |
| Calves and ankles | Absorb impact and prevent rolled ankles | Slow calf lowers, single-leg balance, heel walks |
| Balance | Uneven, loose ground on most descents | Single-leg stands, step-downs onto unstable surfaces |
| Real descents | Builds muscle tolerance to downhill walking | Hill repeats, stair descents, long walks with a pack |
| Technique and kit | Reduces load on the knees | Trekking poles, short steps, bent knees, well-laced boots |
Why downhill hiking hurts
Eccentric loading
When you walk uphill, your thigh muscles shorten as they push you up (a concentric contraction). When you walk downhill, the same muscles lengthen while working to stop you falling forward and to control your knee as it bends. This is an eccentric contraction.
Eccentric work is efficient in energy terms, which is why descending feels easier on the lungs. But unaccustomed eccentric exercise causes microscopic muscle damage, leading to loss of strength, stiffness and the delayed-onset muscle soreness (DOMS) that peaks a day or two after a big descent. That is why your thighs can be sorer after coming down a mountain than after going up it.
The good news: the repeated bout effect
Muscles adapt quickly to eccentric work. Research on the so-called repeated bout effect shows that a second bout of eccentric exercise causes much less damage and soreness than the first. In one study of loaded downhill walking, participants who repeated a 45-minute downhill walk two weeks later had less soreness, a smaller drop in leg strength, and lower heart rate and perceived effort. In practice, this means training on descents before your trip protects you on the trail.
Higher load on the knees
Downhill, each step drops your body weight onto a bent knee, and the quadriceps pull hard across the kneecap to control it. Add a pack, a steep gradient and thousands of steps, and the knees and the front of the thighs take most of the strain. Weak glutes and hips can let the knee collapse inwards, adding stress.
Fatigue and balance
Descents usually come at the end of a day or a trek, when legs are tired. Tired muscles absorb impact less well and balance worsens, which is when slips and twisted ankles happen.
The best exercises for downhill hiking
Do these two or three times a week on non-consecutive days. Move slowly in the lowering phase: a count of three to four seconds on the way down is what trains the eccentric strength you need. If you have knee pain or a previous injury, check with a physiotherapist before starting.
1. Slow step-downs (the most important exercise)
Stand on a step or low box on one leg. Slowly lower the other heel towards the floor in front, taking three to four seconds, keeping your standing knee in line with your second toe. Touch the floor lightly, then push back up. Start with a 10–15 cm step and progress to 20–30 cm, then add a rucksack.
Sets: 3 sets of 8–12 per leg.
2. Eccentric squats
With feet hip-width apart, lower into a squat over four seconds, keeping your weight in your heels and your knees tracking over your toes. Stand up at normal speed. Progress by holding dumbbells, wearing a loaded pack or squatting to a lower box.
Sets: 3 sets of 10–12.
3. Split squats and reverse lunges
Split squats build single-leg strength in the position you are in on a steep step down. Lower slowly until the back knee almost touches the floor, then drive up. Reverse lunges are kinder to the knees than forward lunges and still train control. Once these feel easy, try rear-foot-elevated (Bulgarian) split squats.
Sets: 3 sets of 8–10 per leg.
4. Single-leg Romanian deadlift
Standing on one leg with a slight knee bend, hinge forward at the hips while the other leg extends behind you, then return. This strengthens the glutes and hamstrings and improves balance, both of which help keep the knee stable on descents.
Sets: 3 sets of 8–10 per leg.
5. Lateral band walks and glute bridges
With a resistance band around your knees or ankles, take slow side steps keeping tension in the band. Follow with glute bridges, progressing to single-leg bridges. These target the hip muscles that stop the knee falling inwards.
Sets: 2–3 sets of 12–15 steps each way; 3 sets of 12 bridges.
6. Slow calf raises and lowers
On the edge of a step, rise up on both feet, shift onto one foot, and lower slowly over three to four seconds until your heel drops below the step. Strong calves and Achilles tendons absorb impact on steep, rocky ground.
Sets: 3 sets of 10–15 per leg.
7. Ankle stability and balance
Stand on one leg for 30–60 seconds, then progress to doing it with eyes closed, on a cushion, or while turning your head. Add heel walks and toe walks to strengthen the muscles around the ankle. Good balance is your best protection on loose descents.
8. Wall sits (isometric strength)
Sit against a wall with knees at about 90 degrees for 30–60 seconds. Isometric holds build quad endurance and are often well tolerated by sensitive knees. Use a shallower angle if deep bending is uncomfortable.
9. Core work
Planks, side planks and dead bugs help you stay upright and controlled with a pack, especially when you need to react to a slip.
Train on real descents
Gym work builds strength, but your legs also need to get used to the specific pounding of going downhill. Build these into your week:
- Hill repeats with a focus on the descent. Walk up and down a steep hill several times, concentrating on controlled descending.
- Stair descents. Walking down long flights of stairs, in a tower block or stadium, is a convenient way to train if you live somewhere flat. Taking the lift up and walking down isolates the descent.
- Long hill walks with a pack. Carry the daypack you will use on your trek, loaded with water and layers, and choose routes with big descents.
- Decline treadmill. Some treadmills have a decline setting; walking at a gentle decline introduces eccentric load gradually.
Start gently. A big first descent will leave you very sore; the aim is to build up so the repeated bout effect works in your favour.
A 6–8 week downhill training plan
This plan assumes you can already walk for a couple of hours comfortably. Combine it with general aerobic training; our guide on how to get in shape for trekking covers cardio and endurance in more detail.
| Weeks | Strength (2–3 sessions a week) | Descent training | Weekend walk |
|---|---|---|---|
| 1–2 | Bodyweight step-downs (10–15 cm), squats, glute bridges, calf raises, balance. 2 sets each, slow lowering. | 10–15 minutes of stair or hill descents once a week | 2–3 hours with some hills, light pack |
| 3–4 | Higher step-downs (20 cm), split squats, single-leg RDLs, band walks. 3 sets each. | 20–30 minutes of hill repeats or stair descents once or twice a week | 3–5 hours with 500 m or more of descent, pack 5–6 kg |
| 5–6 | Add weight: loaded pack or dumbbells for step-downs and squats; Bulgarian split squats; single-leg calf lowers. | 30–45 minutes of descents with a loaded pack | 5–6 hours with 800 m or more of descent |
| 7–8 | Maintain strength with 2 sessions; reduce volume in the final week before your trip. | One longer descent session, then taper | Back-to-back days of 5–6 hours if possible, then rest before travelling |
Mild muscle soreness for a day or two after a new session is normal. Sharp pain, swelling, or pain that worsens as you walk is not; rest and get it checked.
Downhill hiking technique
Use trekking poles
Poles are the single most useful piece of kit for descents. A study published in the Journal of Sports Sciences in 1999 found that using two poles on a steep downhill reduced forces at the knee by up to about 20%. Poles also improve balance on loose ground. Lengthen them slightly for long descents and plant them ahead of you, so they take weight before your foot lands. Read our guide on how to pick trekking poles for sizing and features.
Take shorter steps
Short steps keep your centre of gravity over your feet and reduce the drop onto each knee. Long strides downhill mean bigger impacts and less control.
Keep your knees soft
Land with a slight bend in the knee rather than a locked leg, letting the muscles absorb the impact. Keep your weight slightly forward over your feet; leaning back is the most common cause of slips.
Foot placement
Look two or three steps ahead and pick flat, stable spots. Place your whole foot rather than landing hard on your heel. On very steep or loose ground, angle your feet slightly sideways or zigzag across the slope, and use rocks and roots as natural steps where they are solid.
Control your pace
Do not let gravity speed you up. A steady, controlled pace is easier on the knees and safer than rushing, especially at the end of a long day. Take short breaks on long descents to rest your quads.
Large steps and drops
Where there is a big step down, lower yourself with poles or hands, or turn sideways and step down side-on. On steep stone staircases, a side-step can spread the load across different muscles.
Protecting your knees on descents
- Strengthen first. Strong quads, glutes and hips are the best protection.
- Use poles on every significant descent.
- Lace boots properly. Tighten the upper laces before a descent so your foot does not slide forward and bang your toes; a heel-lock knot helps. See our guide to lacing trekking boots.
- Wear supportive footwear with good grip and cushioning. Our guide on how to choose trekking shoes explains what to look for.
- Lighten your pack. Every extra kilo is multiplied on steep descents.
- Consider a knee support if a physiotherapist recommends one for an existing problem.
- Get advice if you have arthritis, a past ligament or meniscus injury or ongoing knee pain. A physiotherapist can tailor exercises to you.
Long descents on Everest and Annapurna Base Camp treks
Many first-time trekkers in Nepal train for the climb and are surprised by the descent. On the Everest Base Camp trek, you drop from Gorak Shep at about 5,164 m to Lukla at about 2,860 m over the last few days, a total of more than 2,000 m of net descent, with plenty of extra ups and downs along the way. The long descent from Namche Bazaar to the Dudh Kosi river is steep and on tired legs.
The Annapurna Base Camp trek is famous for its stone staircases. On the way back from base camp at about 4,130 m, you descend through the valley and down the long flights of steps around Chhomrong, which tests knees more than many trekkers expect. Our guides to Everest Base Camp trek difficulty and Annapurna Base Camp trek difficulty explain the terrain in more detail.
The downhill plan above, done in the two months before you travel, will make these days far more enjoyable. For a full Everest-specific programme, see how to train for Everest Base Camp.
Next step
Pick two or three exercises from this guide and start this week, then add a weekly descent session. If you are training for a Himalayan trek, browse our guide to trekking in Nepal or look at our Everest and Annapurna Base Camp itineraries to set a date to train towards.
Frequently asked questions
Why does hiking downhill hurt more than uphill?
Downhill, your thigh muscles lengthen while braking each step, an eccentric contraction. Unaccustomed eccentric work causes muscle micro-damage and delayed soreness, and each step also puts more load through the knee. Uphill is harder on the lungs; downhill is harder on the legs.
What is the best exercise for downhill hiking?
Slow step-downs from a box or stair, lowering over three to four seconds, are the most specific exercise. Combine them with eccentric squats, split squats, single-leg Romanian deadlifts and calf lowers for a complete programme.
How long does it take to train for downhill hiking?
Most people notice a clear difference after six to eight weeks of strength training two or three times a week plus regular descent practice. Even a few downhill sessions help, because muscles adapt quickly to eccentric work.
How do I stop my knees hurting when hiking downhill?
Strengthen your quads, glutes and hips, use trekking poles, take short steps with soft knees, slow down and keep your pack light. If pain persists or you have a past knee injury, see a physiotherapist.
Do trekking poles really help on descents?
Yes. A 1999 study in the Journal of Sports Sciences found two poles reduced forces at the knee by up to about 20% on a steep descent, and poles also improve balance on loose ground.
Why are my thighs so sore two days after a hike?
That is delayed-onset muscle soreness, usually from the eccentric work of descending. It typically peaks one to two days later and fades within a few days. Gentle walking helps. Training on descents before a trip reduces it, thanks to the repeated bout effect.
Is downhill hiking bad for your knees?
Not for most people if they build up gradually, but it places higher loads on the knees than flat or uphill walking. Strength training, poles and good technique reduce the strain. If you have arthritis or a previous knee injury, ask your doctor or physiotherapist for advice.
How much descent is there on the Everest Base Camp trek?
From Gorak Shep at about 5,164 m to Lukla at about 2,860 m you descend more than 2,000 m net over the final days, plus many extra ups and downs. That is why descent training is worthwhile before an Everest trek.