
Annapurna Base Camp trek is one of the best treks in the world that takes you on a walk through the Himalayan landscape of Nepal.
One of the best, short and budget-friendly alternatives to Everest Base Camp trekking is the Annapurna Base Camp trek, which offers you the view of not one, but six massive peaks stretched over 55 km.
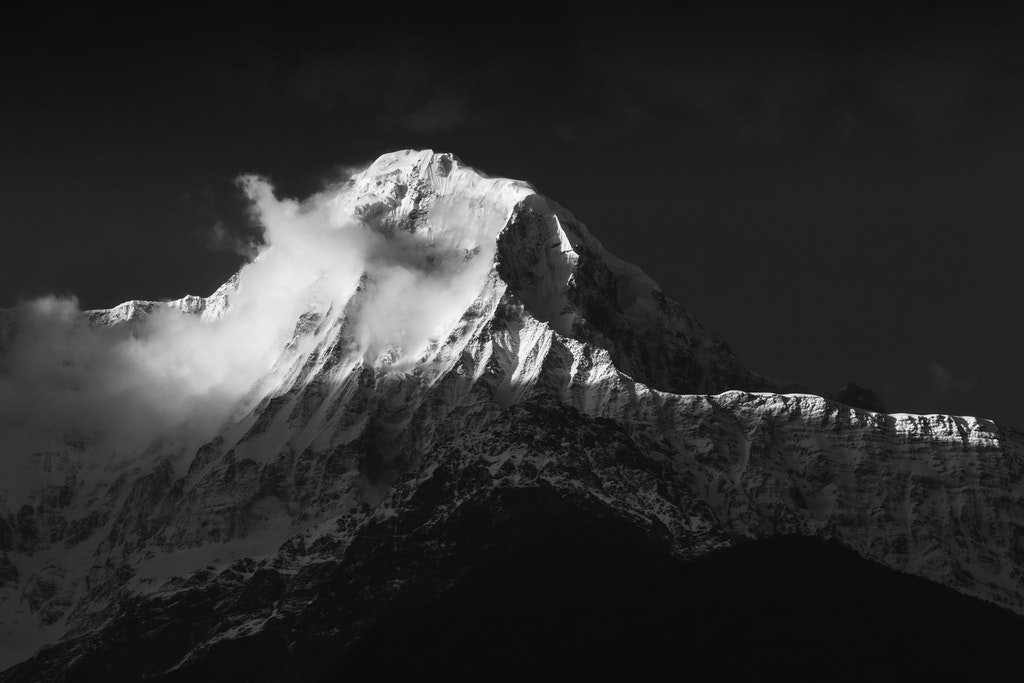
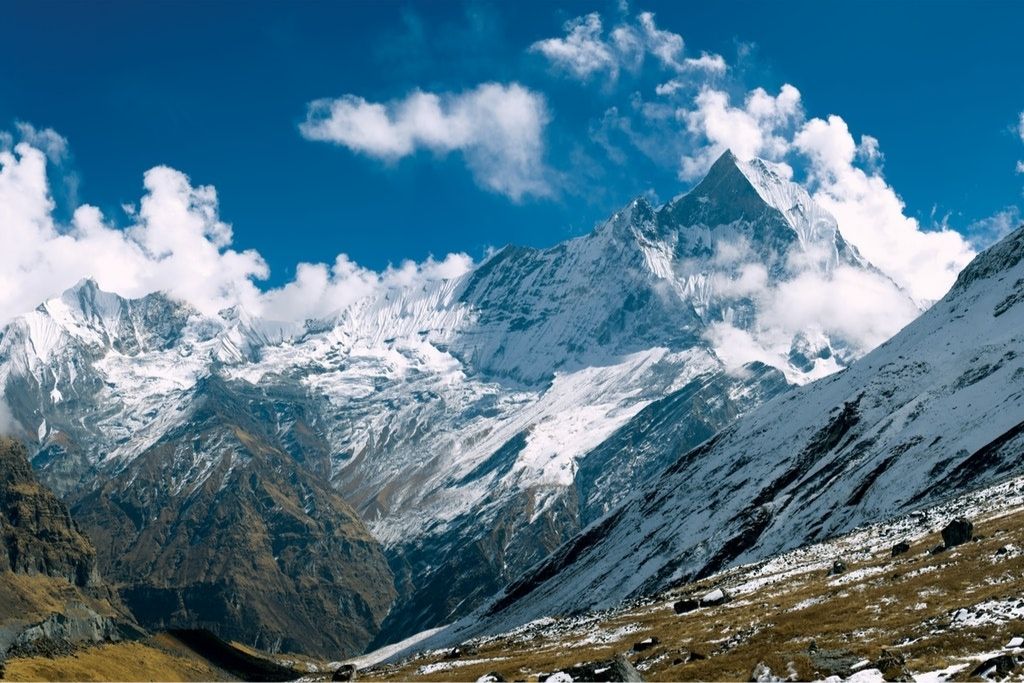
Thus, after you reach the Annapurna Base Camp, you will be able to sight a 360-degree panorama view of some of the highest peaks in the world, like Annapurna I (8091 m), Annapurna III (7555 m), Annapurna South (7219 m), Machhapuchhre (6993 m), and Hiunchuli (6441 m ).
In 2018, Nepal’s Government banned sightseeing flights to Annapurna Base Camp, so trekking is solely the only way you can get to the camp.
Most of the trekking towards Annapurna Base Camp consists of hiking below 3,000m (10,000 feet), and the terrain leading to the camp can be quite challenging. However, you will surely be compensated for the challenges due to the mountains’ breathtaking view, the in-between experience of living around a typical Nepali village, lush green Rhododendrons, and the alpine forests along the hiking route.
Annapurna Base Camp Trek Overview
Distance: 80 km
Days required: 4-7 days
Total ascent: 4975 m
Total descent: 5040 m
Difficulty: Moderate
Permits: TIMS card (NPR 2000/ US $17) and Annapurna Sanctuary Permit (NPR 3000/ US $25)
Costs per day: $25-$27 per day
Accommodation: Teahouses and homestays
Best time to do the Annapurna Base Camp trek
We highly recommend you plan your trek to Annapurna Base Camp during the autumn time in mid-September or around March to May when the area is experiencing the Spring season. During these times you will be able to witness fully bloomed Rhododendrons throughout your hiking trails and a clear view of majestic snow-capped mountains.
Although planning your trip around the autumn or spring season is better, they are also the months when the trails are crowded. So, if you want to avoid the crowd you can trek in winter which falls around December to February. While the temperature can be quite cold during those months compared to others, it is still bearable as the weather will be warm during the day hikes.
The best season to travel in Nepal.
Annapurna Base Camp Trek Temperature
Days in the Annapurna region are warm and pleasant. You can stay warm wearing a T-shirt and layer it up with a warm jacket.
Nights have freezing temperatures that are lower to below zero. Therefore, you will need to wear a couple of warm clothes.
Annapurna Base Camp Difficulty Level
Annapurna Base Camp trek is an easy to moderate trek that beginners can do as well. Therefore, there is a low chance of being a victim of altitude sickness (AMS).
Ensure good health and stamina because you will be walking for about 6-7 hours a day.
For beginners, the Annapurna Base Camp trek doesn’t require prior experience but going on short hikes, walks, and jogging would help you have a blissful experience on this journey.
What is AMS?
AMS, also known as altitude sickness can occur from an elevation of 2,500 meters above sea level. It is caused due to low amounts of oxygen present in higher elevations.
Altitude sickness can occur to anyone irrespective of age and fitness level.
Altitude sickness symptoms include headaches, dizziness, feeling sick, loss of appetite, fatigue, and shortness of breath.
The following are some ways you can prevent altitude sickness:
- Don’t rush. Climb slowly and rest in between.
- Drink at least 3 liters of water per day.
- Acclimatize.
- Take Diamox tablets for prevention.
Permits for Annapurna Base Camp Trek
Before you start your journey towards Annapurna Base Camp, one of the most crucial steps you must take is to obtain an individual Annapurna Conservation Area Project (ACAP) and Trekkers Information Management (TIMS) entry permits.
You can apply for the ACAP entry permit with two passport size photographs. The pass costs NPR. 200 ($1.66) for SAARC Nationals, and NPR. 3000 ($24.93) for other nationals. However, children under the age of 10 do not require any entry fee.
Another essential point to remember while you get the permit is that it is only valid for a single entry. So, you cannot use the pass again for multiple hikes in the national park.
You must carry the ACAP permit with you throughout your hike and show it to concerned authorities at check posts upon request. The pass is non-transferable and non-refundable.
Likewise, to obtain the TIMS entry permit, you must either visit the Nepal Tourism Board’s offices in Kathmandu or Pokhara or even the TAAN Secretariat’s offices at Maligaon or TAAN Pokhara Secretariat in Pokhara.
If you are not aware, the TIMS permit or card is an essential trekking permit you require for all treks in Nepal. To obtain the pass, you need a copy of your passport and two passport-sized photos. It costs about NPR. 2000 ($16.62) if you are doing an independent trek or NPR. 1000 ($8.31) per applicant if you are going in a group.
Travel Insurance
Trekking in higher altitudes of Nepal requires travel insurance.
Your insurance policy must cover all the expenses relating to health issues, accidents and injuries, helicopter evacuation, ambulance transfer costs, hospital charges, medical treatment, medicine, doctor’s fee, and repatriation cost.
Annapurna Base Camp Route and Itinerary
There is two route option you can choose from to trek towards Annapurna Base Camp. You can either reach the base camp via Poon Hill or via Ghandruk.
Route 1: Annapurna Base Camp via Poon Hill
Poon Hill is known to be one of the most famous viewpoints of the Annapurna region. It is the longer route that several trekkers prefer to take to reach the base camp.
It takes about seven days to complete your hike towards Annapurna Base Camp via Poon Hill. However, the days to get there might also depend on person to person and their walking speed.
- Itinerary
Day 1: To start your journey, you must drive to Nayapul from Pokhara first. You can either take public buses like locals or hire a taxi. After reaching Nayapul, you need to trek for at least one and a half hours, after which you will reach Birethanti.
From there, you will have to hike for another three to four hours to reach your destination for the day in Ulleri Village.
Day 2: Your next destination will be Ghorepani, which is 5-6 hours away from Ulleri village. On your way to Ghorepani, you will also pass a place called Tikhedhunga and cross a suspension bridge over the Bhurungdi River.
Day 3: You can easily reach Poon hill by hiking for one hour from Ghorepani. Poon Hill is quite famous for being a spot to sight panoramic views of the Himalayas and sunrise. After the sightseeing, you can then hike towards a village called Tadapani. It takes another 5-6 hours to reach Tadapani from Ghorepani.
Day 4: Next, you need to head to a village called Chhomrong, which is a place filled with Gurung settlements. During your hike to Chhomrong, you will be walking through dense Rhododendron forest and settlements along Modi Khola and the Annapurna Mountain. It takes about 5-6 hours to walk from Tadapani to Chhomrong, and when you reach the village, you will be able to have a close-up view of Annapurna South Machhapuchhre mountain.
Day 5: From Chhomrong village, you will then have to cross the Chhomrong Khola to reach a place called Bamboo. While trekking towards your destination, you will walk through dense bamboo and Rhododendron forests. You will have to hike for approximately 7 km to reach Bamboo.
Day 6: After reaching Bamboo, you need to walk for at least 4-5 hours to get to a place called Deurali. On your way to Deurali, you must pass through a site called Dovan and Hinko cave.
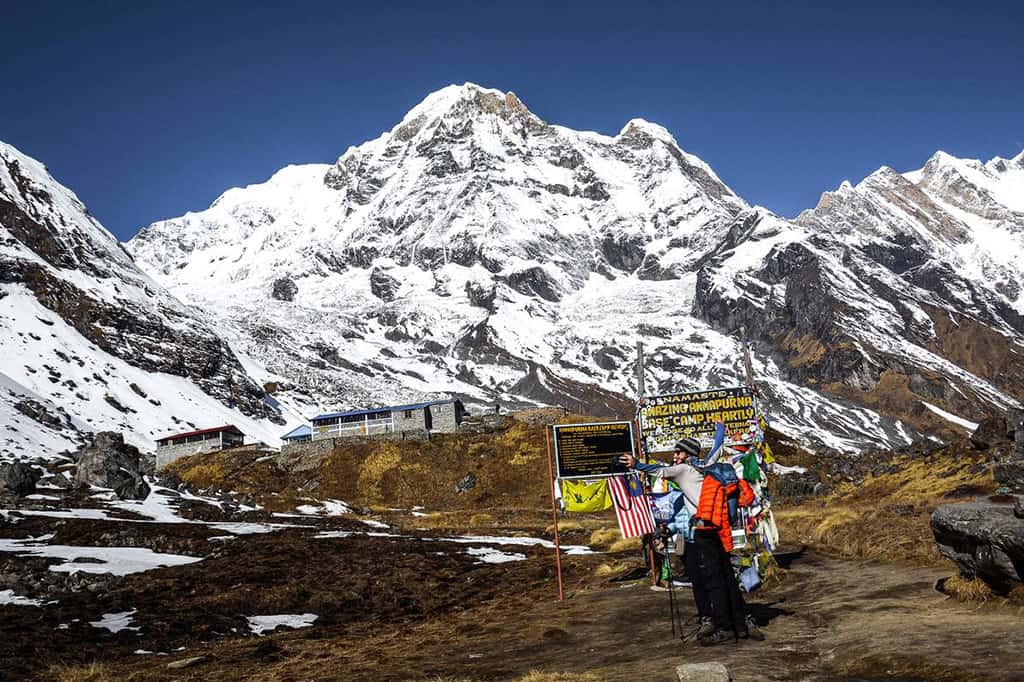
Day 7: From Deurali, you need to walk for four hours to reach the Annapurna Base Camp. On your way to the camp, you will witness some magnificent views of Annapurna massif. Since it is your last day of the hike, we highly recommend you hike slowly towards the base camp so that you can adapt to the increasing altitude.
It takes about 2-3 days for you to descend from the Annapurna Base Camp to Pokhara by trekking.
Route 2: Annapurna Base Camp via Ghandruk
Trekking via Ghandruk towards the Annapurna Base Camp is the best choice if you are interested in going for a trek but do not have much time to spend in Nepal. It takes only four days to reach the base camp from this route, mainly if you are a fast hiker.
Through this route, you will be walking through the beautiful village of Ghandruk, where you will have a chance to explore the traditional Gurung culture and their lifestyle. Likewise, the town also provides a magnificent view of the snow-capped Annapurna Range.
Furthermore, just like the route via Poon Hill, you will have the chance to walk through the dense rhododendron forests, cultivated farmlands, and cross bridges over the river through the Ghandruk route.
- Itinerary
Day 1: On the first day of the trip, you will first have to drive to Nayapul to begin your trek to Birenthati. You need to hike for at least 5-6 hours on this day. From Birenthanti, you need to walk for at least four hours to reach Ghandruk to stay overnight.
Day 2: After enjoying the views, local culture, and lifestyle in Ghandruk, you need to head to Chhomrong. On your way to Chhomrong, you will have to climb up to Kimrungdanda and make some steep descents to Kimrong Khola to reach Chere Danda.
From Chere Danda, you will need to take a gentle walk to reach the lovely village of Chhomrong situated under the giant Annapurna massive. You can complete the distance from Ghandruk to Chommrong by hiking for 5-6 hours.
Day 3: Your next stop from Chhomrong is a place called Deurali. To start your hike, you need to first walk uphill to lower and upper Sinuwa. You will probably have to hike for another 5-6 hours this day to reach your destination.
Then from Sinuwa, you need to walk downhill towards Bamboo, where you pass through some bamboo forests. From Bamboo, you will then need to do some steep climbing through a forest to reach a cave called Hinku. From Hinku, you will see a trail drop closer to a river before you climb again to get to Deurali.
While staying in Deurali, you will be able to experience some views of sparse vegetation, spectacular views of valleys, and rock-face cliffs above graceful waterfalls.
Day 4: From Deurali, you then need to hike to Machhapuchhre Base Camp and then finally to the Annapurna Base Camp. Your hike towards Machhapuchhre Base Camp might be quite strenuous. However, this trial provides you with the majestic views of Machhapuchhre, Mt. Hiunchuli, Annapurna South, Annapurna I, Annapurna III, Gandharvachuli, and Gangapurna.
After you reach Machhapuchhre Base Camp, you will need to take a wide path leading you to the Annapurna sanctuary. You will be able to witness a near-vertical south face of Annapurna towering above you throughout your hike to the leading destination. Your last walk is estimated to be completed within 5 hours.
Once again, it will take about 2-3 days for you to descend from the base camp and reach Pokhara.
Annapurna Base Camp Trek Cost
Apart from your permit costs, some of the other things you might want to consider are the expenses of your accommodation, meals, and transportation throughout your travel.
The cost of your trek can mainly also depend on whether you are conducting your trek through an agency or doing it independently.
If you book through an agency the package generally includes all permits, transportation, accommodation, meals, guide, and porter. However, one thing to note is that the packages do not include travel insurance, visa fees, and trekking equipment. The Annapurna Base Camp trek package will cost you around $600-$799.
But if you are planning to trek alone and have no idea what to expect, don’t worry we have got you covered.
Here are some of the expenses you need to consider in detail:
Transportation
If you are in Kathmandu, to commence your Annapurna Base Camp trek you need to first go to Pokhara. You have an option to either take a flight or a bus to Pokhara city. The flight usually costs between $90- $124 per person.
Likewise, there is also an option to take a tourist bus or local minibus from Kathmandu. The tourist buses cost between NPR 700-1500 per person and a local minibus costs between NPR 400-600 per person.
After you reach Pokhara your next goal is to reach Nayapul. You can either hire a private taxi to Nayapul which generally costs NPR. 2000 one way. However, there are also several buses that take you from Pokhara to Nayapul and they charge you NPR 300 for a one-way ride.
Thus, if you are on a tight budget, we highly suggest you travel through buses during your travel to bring down the cost.
Accommodation
You will find many accommodation options in the Thamel district and even near the airport in Kathmandu. You can opt to stay at a luxurious hotel, budget-friendly lodges, and even homestays and hostels in Kathmandu.
After you leave Kathmandu, you can enjoy your stay at Pokhara’s Backpackers Hostel or any other hotel.
The trail towards Annapurna Base Camp is facilitated by several tea houses. Since the base camp is situated at a high altitude, the tea houses can be a bit expensive because of the difficulties of bringing goods from steep landscapes. However, the accommodation can also vary depending on the standard of the tea house.
The teahouses and lodges you will be staying on the trails will have basic facilities like beds and little to no furniture. Some may have attached the bathroom. Otherwise, they usually provide shared baths and restrooms.
If you want to take a hot shower, you need to pay extra. AC and heater are not available; thus, carry a sleeping bag to stay warm.
The best thing about staying at homestays and teahouses is getting to experience the local people’s local food, tradition, culture, and lifestyle.
Usually, the tea houses in the Annapurna Base Camp route costs you around $5 per night.
Meals
During your time in the tea house, the owners expect you to have your meals at the same place. The tea houses have menus with several choices with fixed pricing set by Nepal Tourism Board.
Make sure to carry some nuts and dry fruits with you beforehand to save yourself from buying overpriced snacks.
Water
Being hydrated and well nourished on the trek is very vital.
You can buy 1L mineral water at teahouses along the trail. The prices of mineral water increase with the elevation. You may need to pay somewhere between NPR 100-NPR 170 per bottle.
However, make sure not to leave the bottles on the trail. Instead, only dump it on the garbage bins of teahouses.
The tea houses provide you with filtered drinking water without any charge, so make sure to pack a refillable bottle. You can also get your own Steripen (UV sterilizer) or iodine tablets just in case.
Do you need a guide for the Annapurna Base Camp Trek?
If you are an experienced trekker and are doing the trek independently, we highly recommend you hire a guide for the company. Likewise, if you do not want to carry your own gears, hire a porter.
You might think they might be expensive and unnecessary expenses, but a guide and porter are quite affordable during trekking.
Just make sure that your guide speaks good English and has an insurance policy. A porter doesn’t need to speak English as the guide can direct him. However, he also needs to have an insurance policy.
Furthermore, hire a local guide and porter as they are much more experienced and know the places and tea houses very well. Guides usually charge you $22-$25 per day and porters charge you $15-$22 per day.
Minimizing Expenses While on Annapurna Base Camp Trek
The Annapurna Base Camp is a relatively budget-friendly trek. However, if you are traveling on a backpacker’s budget, here are some of the tips you need to use to keep your costs down:
- Carry snacks: Buy your snacks while you are in Kathmandu. The food at teahouses isn’t costly, but it is better to bring your snacks like granola bars and nuts rather than buying a full meal.
- Share meals: The teahouses usually offer DalBhat for lunch and dinner. This meal keeps you full for the day, and if you want to save money, you can order one Dal Bhat and one other meal. You can refill your DalBhat as much as you want.
- Carry a Steripen: Steripens and Iodine tablets help you drink pure water for free. You can refill your bottle with stream water and use these to purify it. These will help you cut costs on buying multiple mineral water bottles per day.
- Travel in a group: You can meet up with other fellow trekkers or ask your agency to help you find one so that you can share your costs with them. Doing so also enables you to get discounts at the teahouses.
- Use public transportation: Traveling on a private vehicle sure sounds pleasing, but if you want to save costs, it is best to travel to and from the destination on a public bus.
Trekking Gears or Trekking Equipment Required
Here is a list of things you need to consider packing before you commence your trek:
- Trekking bagpack
- Daypack (optional)
- Travel documents like passport, visa, travel insurance, and passport size photos
- Headlamp, torch, flashlight, and binoculars
- Money/purse
- Sewing kit, swiss knife, lighter and a padlock
- A toilet kit, Hhand sanitizer, lightweight towel, and other toiletries
- Sleeping bag
- Day pack (with waist strap), refillable bottle
- Sunglasses
- Suncap
- Wind and waterproof shell jacket and trousers
- Socks (thick wool blend and thin cotton ones)
- Lightweight thermal gloves and Synthetic hand gloves
- T-shirts (short and long-sleeved)
- Personal medical kit and regular medicines
- Steripen/Iodine
- Reusable water bottle
- Towel
- Trekking/Hiking boots
- Trekking pole
- Cutlery
If you are trekking in the winter make sure to pack
- Layered clothing like thermals
- Heavy and lightweight jumpers
- Fleece wind stopper jacket
- Down jacket
- Fleece or wool trousers
- Four season sleeping bag
- Warm wool socks
- Gaiters
- Woollen cap or Balaclava
The essential items for trekking
More Pro Tips for Annapurna Base Camp Trek
- Buy a map
You can buy a map at around $1-$2 at the streets of Thamel (Kathmandu) and Pokhara. While offline, you can also check your route with maps.me on your phone.
- Get a walking stick/poles
You may think you’re young and have all the energy in the world, but trust me, you’ll need it. Pokhara has several equipment shops where you can either purchase or rent one. A walking stick or poles help relieve pressure on your knees and calves. You will have an easier time walking with a walking stick than without it.
FAQs
What minimum fitness level is required for the Annapurna Base Camp trek?
ABC trek is a moderately challenging trek that beginners can do as well. It would help if you were physically and mentally fit to carry out the trek.
How long do we have to walk every day on this trek?
You will have to walk about 4-6 hours per day on average. However, sometimes you will also have to walk for 6-7 hours.
At what altitude does the ABC trek reach its highest point?
You will reach the highest altitude at the Annapurna Base Camp, situated at an altitude of 4130 meters.
Are there battery charging and hot shower facilities throughout the trails?
Yes, battery charging and hot shower facilities are available throughout the route at a certain cost ($1-$2).
Are there ATMs en route to ABC?
There are no ATMs on the trails to ABC. You need to withdraw money from Kathmandu or Pokhara.
Are there internet facilities throughout the trails?
Yes, there are internet facilities in most places. However, the connection may be weak.
Is hiring guides and porters for the Annapurna Base Camp trek compulsory?
Annapurna Base Camp trek sure is a moderate level trek. However, hiring a guide and a porter ultimately depends on your preference and budget.
In my opinion, if you are a beginner or aren’t confident with trekking alone or want everything taken care of, it is best to hire a guide. Even though it is effortless to find the route, having a guide with you will give you an additional knowledge about the villages and the culture of the region.
Hire a porter if you think you cannot carry your backpack yourself and want to enjoy the freedom of walking freely. It is also best to hire one for safety reasons.
How to get ready for the trip?
While getting ready for the trip, the first thing to note is being informed about your current fitness level. You must start working out and going on walks, short hikes, cycling, swimming, and running.
Also, consult a doctor for the required vaccination and personal medications.
Overall, the Annapurna Base Camp is undoubtedly one of the best trekking trail options in Nepal. It is cheap, easy, and provides you with the best and majestic views of the Annapurna Massif. Just be careful and hire a guide or a porter to have a successful journey.