
Before you get confused about why we have written an article on how to clean trekking boots, as if it is such a hard thing to do so, let us create a scenario for you.
Imagine you are returning from a great trekking trip and you’ve walked through different terrains- muds, rocks, and snow. In such a scenario, trekking boots are the most heavily used gear in a long-distance hiker’s arsenal. They take a lot of abuse and can get dirty if not cared for properly.
Years from now, well-worn leather boots will be passed down from generation to generation and cherished as the only remaining keepsake of long-ago adventures. But if you don’t take care of your boots, they won’t last nearly as long. Vigorous walking, exposure to water, and general wear and tear all take their toll on leather boots, and the only way to keep them in good shape is to clean them regularly.
Getting a pair of boots that lasts is essential. To keep your boots clean and in good condition to keep them from wearing out too quickly is more vital.
There are more than some ways to clean trekking boots. When out on the trail, it can be hard to find supplies to do a thorough cleaning. But once you are home or in the hotel room, all you need is a few supplies and the right technique and you are good to go.
Cleaning your boots can take a lot of work, and this blog is a guide to a successful boot cleaning experience.
How to clean trekking boots: Things you need
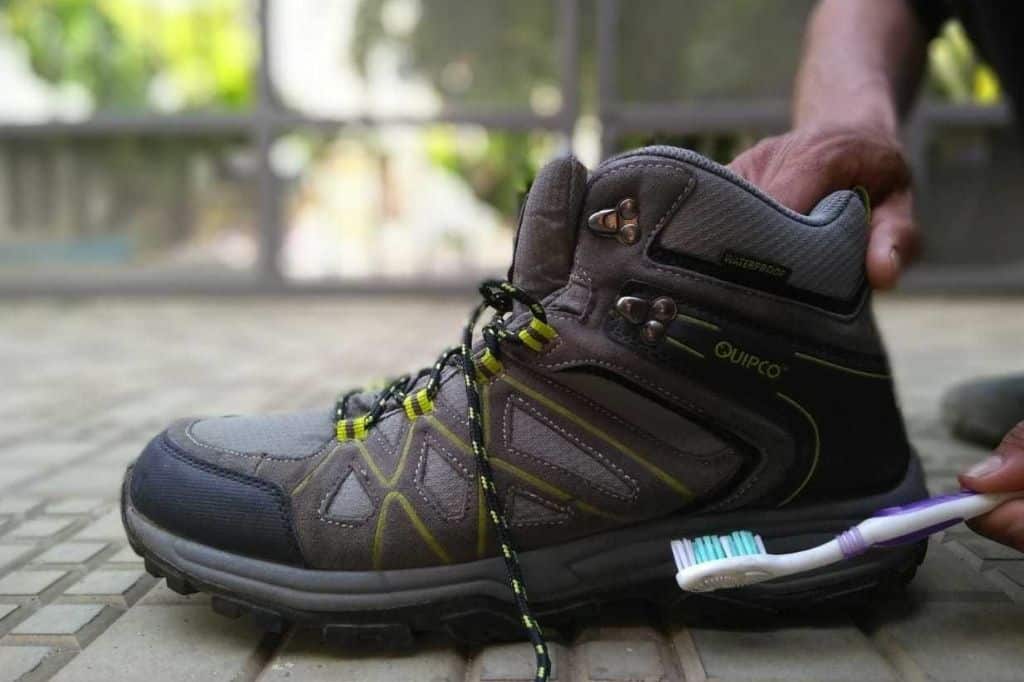
- Boot brush (Soft brush, vegetable brush, or even toothbrush works fine)
- Aglets
- Saddle soap or footwear cleaning gel
- Cool water
- Water faucet
- Disinfectant (if odors)
How to clean trekking boots: Steps
The style of boot that is approved for long-distance walking and hiking needs to be cleaned after each trek. A boot of this nature is made to handle the rugged terrain that is encountered when hiking.
To keep them in a first-class condition, we suggest the following care routine:
Step 1: Remove dirt from shoes
It would help if you cleaned off the soles of your hiking shoes by rubbing them together to remove any dirt or mud. It is an excellent opportunity to use the eraser side to remove any scuff marks. This step helps the leather stay supple.

Grasp both handles, and lift your heels and bang the heel of the boots together several times. For high-top hiking boots, fold down the top, then do the same thing.
TIP: A soft-bristled toothbrush can help you clean out any hard-to-reach spots in your soles, like treads or around laces.
Then, wipe down your boots with a damp cloth or shop rag after every time you use them. It will remove any debris that has gotten into your boots and allow you to check for wear and tear.
Step 2: Clean the insoles first
Pull the insole out to clean the boots thoroughly. You can either use a damp cloth and wipe them down with soap and water.
You can also wash them in cool water with a mild detergent or a mixture of baking soda and water. Make sure you rinse them out thoroughly.
Don’t soak them! Brush away any caked-on dirt using a soft brush or toothbrush.
Step 3: Loosen the laces
Use your fingers to loosen the laces until they are loose enough for you to push a screwdriver or an ice pick into the eyelets and remove the boot.
Using a shoelace-removing tool, also known as Aglets, is easy, and this is best done when shoes are still wet from washing.
Using one of these, loosen each lace individually in order to get an even cleaner touching of the leather boots. To clean the laces, remove them from the shoes and hand wash them. For more detail, you can use a soft brush or toothbrush.
Step 4: Rinse the boots with saddle soap
Use cool water to rinse your boots thoroughly.
Use saddle soap or boot cleaner to wash leather boots. Keep in mind that saddle soap works best on dirty leather as it softens the material.
Regular brushing isn’t going to work with these boots, as they will wear out before their time and not last through the hike you are planning.

You can use a soft brush to clean the outer surfaces, while you can use a toothbrush to clean the inner parts of the boot. Leather conditioner will need to be used after you have cleaned your boots with a soft brush.
Rinse off the mixture of dirt and soap solution with water until clean before drying with a fresh cloth to remove moisture from your boots.
Take care that you don’t get any water in the seams. To avoid this, point the toe of the boot down and hold it there while rinsing off all sides. A soft-bristled toothbrush can help you get into grooves and crevices.
Apply a water-based stain and wax removing cleaner to removes stains and neutralize odors on your boots. A water-based stain remover removes dirt and mud stains from your boots.
Blot away excess moisture with a soft towel.
Step 5: Water-proofing
It is important to note that the trekking boots need to be waterproof, so you won’t have to worry about getting your socks and feet wet.

A water-based leather wax or spray waterproofing helps protect the leather from harsh weather conditions. It is best to apply the waterproofing sprays when your shoes are cleaned and are wet.
Apply waterproofing spray/grease to leather boots, and make sure it’s evenly distributed. Don’t use it too much! A little goes a long way. You don’t want to saturate the leather, or you’ll end up with wet boots again before you know it!
Here is Nikwax Nubuck and Suede Proof Waterproofing Spray that would work wonders for your trekking shoes.
Let your trekking boots dry for at least 24 hours before putting them to use.
If you’d like to restore the color in your boots, use a leather dye or conditioner to polish the boots and keep them looking new.
Step 6: Drying
Shake off excess water and dry outside of boots by hand with a towel. Work from the toes up, and never put your boots in direct sunlight to dry out.
If your boots are very wet, stuff them with paper toweling before leaving them to air-dry overnight, so they don’t shrink and lose shape.
Make sure your trekking boots are completely dry before putting the insoles back in and re-lacing them. If you notice any dirt accumulated around the seams, use a damp sponge or a soft brush to wipe it off.
Step 7: Storing
Storing your trekking boots in a dry, cool place is the best way to keep them free from mildew and insect infestation. The correct storage environment will also ensure that your boots retain their natural shape and contours.
Never store the boots in a plastic bag as it can cause the leather to dry out and harden. Instead, keep your boots away from any moisture or odor, which can cause mildew growth.
Before storing boots, spray boot bags with a waterproofing spray or apply wax; leave for 24 hours; then re-lace and store boots.
You can also invest in a storage bag for trekking boots.
How often should you clean your trekking shoes?
There are many schools of thought on how often you should clean your hiking shoes. Some people say that you should clean them before every trip, but others say that it’s unnecessary to do so if you’re only going on short day hikes.
It depends on how often and how long you go on hikes. If you’re going on a long trek, it is better to take the time to clean them properly as soon as you reach home. That way, they will be ready to go when you need them.
But if you’re a beginner, or if most of your hikes are short, then it might not be worth it to clean your boots after every hike. But if you have two pairs of hiking boots (one pair for long hikes and the other one for just day trips), it is better to clean both pairs now and then.
One thing to keep in mind is that the more you clean your hiking shoes, the sooner they will start to wear out. After all, you’re going to have to use more cleaning products to get them cleaned properly after each hike.
You should only do this if your shoes aren’t comfortable anymore or if you want them cleaned before giving them away.
How to clean trekking boots: Conclusion
The above are the tips needed for cleaning your trekking boots. With this information, you will be able to keep your trekking boots in prime condition as long as it is needed. This procedure will extend your boot life and give you a pair of hiking boots that are comfortable on those long walks.
When you’re cleaning your hiking shoes, you should always pay attention to your feet. If you are unsure about something and do not know how to clean or repair the boots, don’t hesitate to have your hiking shoes cleaned by a professional shoe repair shop.
Your boots are the most vital part of your hiking apparel, so keep them clean, and they will love you back!
If you have any queries or want to share how you clean your trekking boots, feel free to comment down below.
Read more: Learn more about cleaning water bottles, flasks, and bladders.