
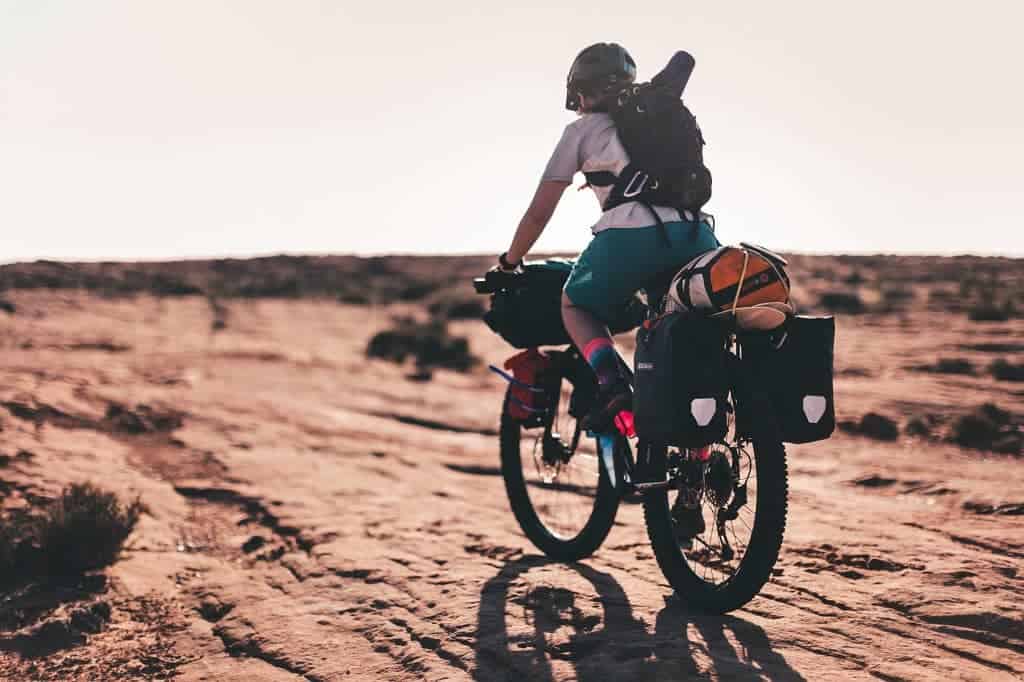
Bikepacking is multi-day cycling where you carry everything you need, from tent to stove, in lightweight bags strapped directly to the bike, usually on gravel tracks, forest roads and trails rather than tarmac. You do not need a special bike or expensive kit to start: almost any reliable bike with wide tyres, three or four bags and a simple overnight route will do.
This beginner’s guide covers what bikepacking is, which bikes work, how to set up your bags, a full kit list, how to plan a route, famous routes to aim for and how to stay safe. If you want to ride in the Himalaya, see our guide to mountain biking in Nepal.
Bikepacking at a glance
| Question | Short answer |
|---|---|
| What is it? | Self-supported, multi-day riding with bags fixed to the frame, bars and seatpost, mainly off-road |
| Best bike for beginners | The one you already own, if it is reliable and takes tyres of 40 mm or wider; otherwise a hardtail mountain bike or gravel bike |
| Essential bags | Seat pack, handlebar roll, frame bag (half or full) and a top-tube bag |
| Typical daily distance | 40–100 km off-road, depending on terrain, fitness and load |
| Typical load | Around 8–15 kg of gear plus water and food |
| Ideal first trip | One night, 30–60 km each day, close to home, with an easy bail-out option |
| Starter budget | From roughly £150–300 for basic bags if you already own a bike and camping kit |
What is bikepacking?
Bikepacking combines cycling with lightweight backpacking. Instead of racks and panniers, you use soft bags that strap to the frame, handlebars and seatpost. That keeps weight central and narrow, so the bike still handles well on rough tracks, narrow trails and steep, loose climbs where a loaded touring bike would struggle.
Most bikepacking trips are self-supported: you carry your shelter, sleeping kit, clothing and at least a day’s food and water, resupplying in villages along the way. Trips range from a single “overnighter” in the woods to multi-month expeditions and races across continents.
Bikepacking vs bike touring
The two overlap, and many riders use the words interchangeably. The differences are mostly about terrain and luggage.
| Bikepacking | Bike touring | |
|---|---|---|
| Terrain | Gravel, dirt roads, forest tracks, singletrack | Mostly tarmac and good tracks |
| Luggage | Frame, seat and handlebar bags | Racks and panniers, sometimes a trailer |
| Load | Light and minimal | Heavier, more comfort items |
| Typical bike | Mountain bike or gravel bike | Steel touring bike with racks |
| Speed | Slower per hour, rougher ground | Faster on roads, longer days |
Bikepacking is not just for young, super-fit riders. People of all ages ride, and the pace is up to you. Many riders deliberately plan short days with time for swimming, photography or a long lunch.
Which bike do you need for bikepacking?
The best bike to start with is the one you already have, as long as it is reliable, fits you well and can take reasonably wide tyres. Ride the routes your bike is suited to, then upgrade if you get hooked.
| Bike type | Best for | Pros | Cons |
|---|---|---|---|
| Hardtail mountain bike | Mixed terrain, rough tracks, singletrack | Strong, wide gear range, room for a frame bag, many already own one | Slower on tarmac and smooth gravel |
| Gravel or adventure bike | Gravel roads, byways, long distances | Fast and efficient, comfortable drop bars, often lots of mounts | Less capable on technical trails; lower gears may be needed |
| Rigid mountain bike or “monstercross” | Long expeditions, remote routes | Simple, robust, room for big tyres and bags | Rougher ride without suspension |
| Full-suspension mountain bike | Technical trails, enduro-style routes | Comfort and control on rough ground | Little frame space for bags; heavier |
| Fat bike | Snow, sand, winter routes | Huge traction and floatation | Heavy and slow on firm ground |
| Touring bike | Gentle gravel and road mixes | Comfortable, durable, lots of mounts | Narrower tyres, heavier |
Features that help
- Low gears. A loaded bike on steep gravel needs easy gearing. A wide-range cassette or a small chainring will save your knees.
- Wide, tubeless tyres. Tyres of around 40–50 mm on a gravel bike or 2.2–2.6 in on a mountain bike give comfort and grip. Tubeless sealant fixes most small punctures by itself.
- Mounting points. Bottle bosses on the fork and under the down tube let you carry extra water and small cargo cages.
- Frame space. A larger main triangle fits a bigger frame bag, which is the best place for heavy items.
- Fit and comfort. Long days in the saddle magnify small fit problems. A well-fitted saddle and good contact points matter more than a light bike.
Before any trip, give your bike a thorough service: check brake pads, chain wear, gear cables, tyre condition, wheel bearings and that every bolt is tight.
Bikepacking bags and setup
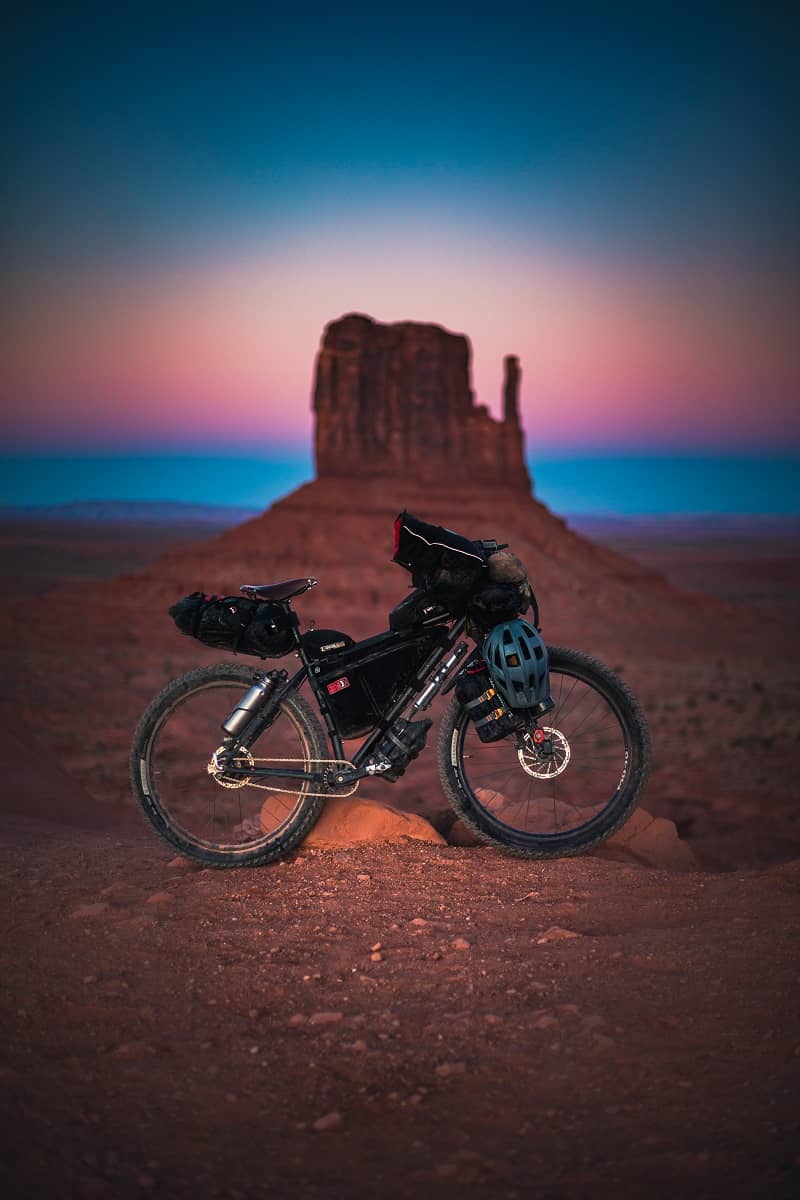
Bikepacking luggage has four main parts. You do not need all of them at once: most beginners start with a seat pack and a handlebar bag, then add a frame bag.
Seat pack (saddle bag)
A large, tapered bag that straps to the seatpost and saddle rails, usually holding 8–17 litres. Use it for light, squashable items such as your sleeping bag or quilt, spare clothes and a down jacket. Pack it tightly and cinch the straps hard to stop it swaying. If you use a dropper post, check the bag leaves enough travel or choose a dropper-compatible design.
Handlebar roll or harness
A dry bag held in a harness or strapped directly under the bars, typically 9–15 litres. It suits bulky but light gear like your tent body or sleeping mat. Keep it clear of cables and the front tyre, especially on bikes with suspension forks. A small accessory pocket on the front is useful for snacks and a phone.
Frame bag
The frame bag sits inside the main triangle and is the most stable place for heavy items: tools, stove, fuel, food and a water bladder. Full frame bags use all the space; half frame bags leave room for bottles. Some brands make bags specific to your frame size.
Top-tube, stem and fork bags
A top-tube bag keeps snacks, a phone, sunscreen and a power bank within reach while you ride. Stem bags (sometimes called feed bags) hold a bottle or snacks beside the bars. Fork cages carry extra water or bulky items such as a tent, which lowers the bike’s centre of gravity.
Packing principles
- Heavy and low, light and high. Put dense items in the frame bag and light, bulky items in the seat pack and handlebar roll.
- Keep the bike narrow. Wide loads catch on gates, rocks and bushes.
- Waterproof everything that must stay dry. Many bags are only water-resistant, so use dry bags for your sleeping bag and spare clothes.
- Use a small backpack sparingly. A hydration pack is handy on hot days, but anything on your back makes long days less comfortable.
- Test-ride fully loaded. Check for rattles, rub on the tyre, stem or cables, and how the bike handles on a steep descent before your trip.
Bikepacking kit list
A light setup makes everything more fun: climbs are easier, the bike handles better and you will ride further with less effort. Adapt this list to your route, season and how remote you will be.
Sleep system
- Shelter: lightweight one-person tent, tarp and bivvy bag, or a hammock where there are trees
- Sleeping bag or quilt rated for the lowest night temperature you expect
- Insulated sleeping mat; see our guide to sleeping pads for how R-values work
- Optional inflatable pillow and earplugs
Clothing
- Padded cycling shorts or liners (two pairs for longer trips)
- Breathable riding top and a long-sleeve base layer
- Lightweight waterproof jacket, plus waterproof trousers in wet climates
- Insulated jacket for evenings and cold mornings
- Camp clothes: a dry top, leggings and socks you only wear at night
- Gloves, buff, cap or warm hat, and arm and leg warmers
- Helmet and sunglasses
Cooking, food and water
- Small stove, fuel and a pot that doubles as a mug, or plan to cold-soak or buy hot food
- Lighter, long spoon and a small knife
- Water bottles and/or a bladder for 2–4 litres, more in hot or dry areas
- Water filter or purification tablets
- A day’s food plus an emergency reserve
Hydration matters even more on a bike, because airflow hides how much you are sweating. Our guide to staying hydrated applies just as well to riding, and you can find tips on keeping bottles and bladders clean in our water bottle cleaning guide.
Repair kit and tools
- Pump and/or CO2 inflator
- Spare inner tube, tubeless plugs and sealant, and tyre levers
- Multi-tool with a chain breaker, plus spare quick links
- Spare brake pads, a spare gear cable and a derailleur hanger for your frame
- Cable ties, a little duct tape and chain lube
- Small rag and a pair of disposable gloves
Learn to fix a puncture, replace a tube on a tubeless wheel, join a chain and adjust your gears before you leave. Most mechanicals on the trail are simple if you know how to deal with them.
Navigation, power and safety
- GPS bike computer or phone with offline maps, and a paper map for remote areas
- Power bank and charging cables
- Front and rear lights
- First aid kit with blister care, painkillers, antiseptic and any personal medication
- Satellite messenger or personal locator beacon for remote routes
- Sunscreen, lip balm, insect repellent and chamois cream
- Toothbrush, small towel, trowel and toilet paper
- Bank card, some cash, ID and insurance details
What to eat on a bikepacking trip
Riding a loaded bike all day burns a lot of energy, so eat little and often rather than relying on big meals. Pack calorie-dense foods that survive being squashed and shaken.
- Breakfast: porridge or granola with powdered milk, nut butter, coffee or tea.
- On the bike: nuts, dried fruit, flapjacks, energy bars, chocolate, oatcakes and cheese.
- Lunch: tortilla wraps with cheese, salami, hummus or tuna sachets.
- Dinner: couscous, instant noodles, rice or freeze-dried meals, with olive oil for extra calories.
- Resupply: village shops, cafés and pubs are part of the experience. Check opening days, as rural shops often close early or on Sundays.
How to plan a bikepacking route
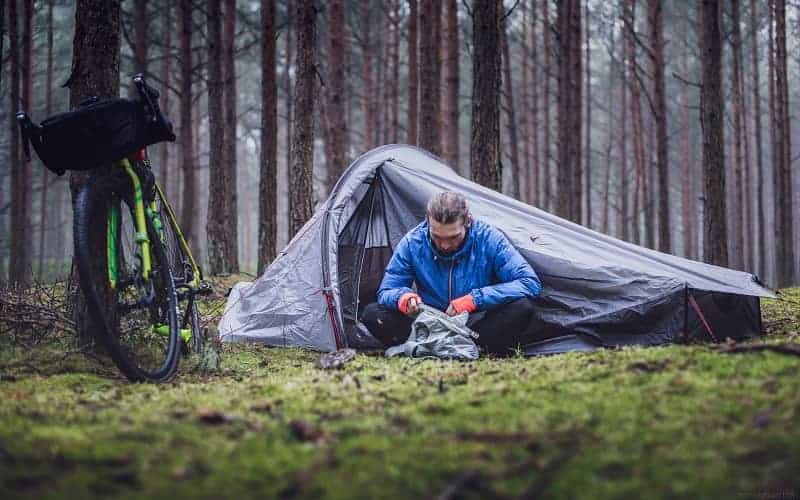
- Start small. Plan a one-night trip of 30–60 km a day near home. Off-road with a load, you may average only 10–15 km/h, so be conservative.
- Use an established route. Published routes, such as those from Cycling UK and the Adventure Cycling Association, have been tested and usually list resupply points and camping options.
- Plot it yourself. Route-planning apps such as Komoot and Ride with GPS show surface types, elevation and legal rights of way. Download the route and maps for offline use.
- Check access and camping rules. Make sure you are allowed to cycle on each section and know where you can sleep (see below).
- Plan water and food. Mark taps, streams, shops and cafés, and work out the longest gap between them.
- Build in bail-out options. Note train stations, bus routes and roads where you could shorten the trip if the weather turns or something breaks.
- Check the weather and season. Spring and early autumn are often ideal; mid-summer can be hot and busy, and winter means short days, mud and cold nights.
Where can you camp?
Rules differ widely between countries. In Scotland, the Scottish Outdoor Access Code allows responsible, lightweight wild camping on most unenclosed land, with exceptions such as seasonal permit zones in Loch Lomond and the Trossachs National Park. In most of England and Wales, wild camping needs the landowner’s permission, so use campsites, bothies or ask locally. Norway and Sweden have a broad right to roam, while much of Western Europe restricts wild camping in national parks. Whatever the rules, camp out of sight, arrive late, leave early, never light open fires where they are banned and leave no trace.
Famous bikepacking routes
| Route | Where | Length | Time | Level |
|---|---|---|---|---|
| King Alfred’s Way | Southern England (loop from Winchester) | About 350 km | 4–6 days | Beginner–intermediate |
| South Downs Way | Southern England | About 160 km | 2–3 days | Intermediate |
| Highland Trail 550 | Scottish Highlands | About 885 km | 1–2 weeks | Advanced, remote |
| Great Divide Mountain Bike Route | Banff, Canada, to Antelope Wells, USA | About 4,450 km | 6–10 weeks | Advanced, very long |
| Colorado Trail | Denver to Durango, USA | About 870 km | 2–4 weeks | Advanced, high altitude |
| Carretera Austral | Patagonia, Chile | About 1,200 km | 3–5 weeks | Intermediate |
| Baja Divide | Baja California, Mexico | About 2,700 km | 4–8 weeks | Advanced, desert |
| Annapurna and Mustang trails | Nepal | Varies | 1–3 weeks | Advanced, high altitude |
King Alfred’s Way, created by Cycling UK, is an off-road loop of about 350 km from Winchester through Salisbury Plain, Stonehenge, the Ridgeway and the South Downs. It is a perfect first multi-day route: a gravel bike works in summer and a mountain bike in the wetter months.
The Great Divide Mountain Bike Route, mapped by the Adventure Cycling Association, follows the Rocky Mountains for about 2,750 miles (around 4,450 km) from Banff to the Mexican border, with more than 200,000 ft (over 60,000 m) of climbing. It is ridden from early summer to early autumn and is also the course of the Tour Divide race.
The Highland Trail 550 is a tough, remote loop through the Scottish Highlands with long sections of hike-a-bike. It suits experienced riders who are self-sufficient and comfortable navigating in bad weather. Other well-known routes include the Colorado Trail, the Carretera Austral in Chilean Patagonia and the desert Baja Divide in Mexico.
Bikepacking in Nepal
Nepal offers some of the most spectacular mountain riding on earth, on old trade trails and dirt roads between villages. The Kali Gandaki valley from Jomsom and the high desert of Mustang are favourites, as are the lower hills around Pokhara and the Kathmandu Valley. Altitude, steep climbs, monsoon landslides and permit rules make these serious trips, and most riders go with a local guide who knows which trails are rideable. Read our Nepal mountain biking guide for routes and seasons.
Bikepacking safety tips
- Tell someone your plans. Share your route, timings and check-in points with a friend at home.
- Carry a way to call for help. In areas without phone signal, a satellite messenger or personal locator beacon can save a life.
- Ride within your limits. A loaded bike brakes and corners differently. Walk technical descents you are unsure of.
- Watch the weather. Cold rain is the biggest risk on many routes. Carry warm layers and know where you can shelter.
- Be visible on roads. Use lights in poor visibility and wear something bright.
- Look after your body. Eat and drink regularly, protect against saddle sores and sunburn, and stop before exhaustion leads to mistakes. If you have a medical condition, speak to your doctor before a long or remote trip.
- Get the right insurance. Check that your policy covers cycling off-road abroad, the altitude you will reach and rescue. Our guide to travel insurance for trekking explains what to look for.
- Respect the land. Stay on legal trails, close gates, give way to walkers and horses, and leave no trace.
Your first bikepacking trip: next steps
Pick a free weekend, choose a route of 30–60 km a day with a campsite or legal pitch at the halfway point, and do a fully loaded test ride a week before. Keep the first trip simple, take notes on what you used and what you did not, and refine your kit from there.
When you are ready for a bigger adventure, Nepal is a superb place to ride or walk among the world’s highest mountains. Explore our Nepal mountain biking guide, see our pick of the best treks in the world if you would rather explore on foot, or tell us what you have in mind and we will help you plan a trip with our licensed local partners.
Frequently asked questions
What is the difference between bikepacking and bike touring?
Bikepacking usually means riding mostly off-road with soft bags strapped to the frame, bars and seatpost. Bike touring usually means riding on roads with racks and panniers. The two overlap, and many riders mix them.
Can I go bikepacking on any bike?
Almost any reliable bike works if it suits the terrain. A hardtail mountain bike or gravel bike is ideal, but a hybrid or old touring bike is fine on easy gravel routes. Wide tyres and low gears make the biggest difference.
How far can you ride in a day when bikepacking?
Most beginners ride 40–80 km a day off-road with a loaded bike. Experienced riders on easier terrain may cover 100 km or more, while steep, technical routes can mean as little as 30 km.
How much does it cost to start bikepacking?
If you already have a bike and camping kit, a basic set of bags can cost roughly £150–300. Lightweight tents, sleeping bags and premium bags can push the total much higher, so borrow or improvise for your first trips.
How much weight should I carry bikepacking?
A typical load is around 8–15 kg of gear, plus food and water. The lighter you go, the easier climbs and rough ground become. Keep heavy items in the frame bag to keep the bike stable.
Do I need a tent for bikepacking?
Not always. Many riders use a tarp and bivvy bag or a hammock, and some use bothies, hostels or campsites. A small one-person tent is the easiest and most weatherproof choice for beginners.
Is wild camping allowed when bikepacking in the UK?
In Scotland, responsible lightweight wild camping is allowed on most unenclosed land under the Scottish Outdoor Access Code, with some local restrictions. In most of England and Wales you need the landowner’s permission, so plan around campsites or ask locally.
Can you go bikepacking in Nepal?
Yes. Areas such as Mustang, the Kali Gandaki valley and the hills around Pokhara and Kathmandu have excellent riding on dirt roads and trails. Altitude, weather and permit rules mean most riders go with a local guide.